_edi.png)

Sales Navigator has become one of the most important tools in the sales tech stack today. If you are building a B2B business, Sales Navigator is crucial. There are many ways to use this product, but today I’ll share a few ways in which I get quality lists created fast.
Accounts First:
First off, I always start with Account Filters and then save it as an Account List. You can start with Lead filters as well, but, LinkedIn uses the ‘Industry’ filter based on the Industry that has been entered by the individual lead as opposed to Industry entered by the business. Hence, It is better to use Account Filters instead.
Account Filters:
With Account Filters, the approach I take is to go broad, and then narrow down.
There are many filters here that range from Industry, Annual Revenue, Headcount Growth, etc. Here is an example of how I use Sales Navigator to first find the right companies to target.
Let’s assume you are targeting Advertising Services and typically sell to Small Business Owners in the USA.
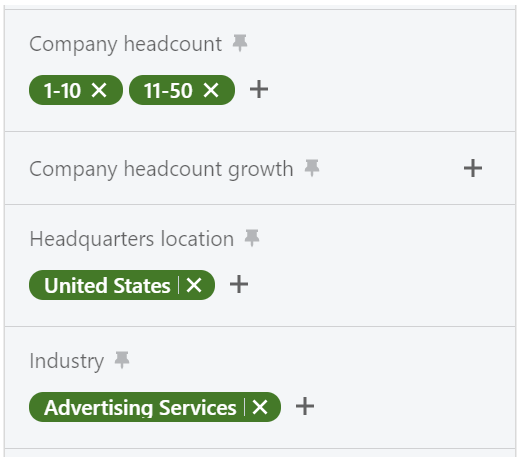
The filters, I choose include:
- Headquarters Location: USA
- Industry: Advertising Services
- Company Headcount - 1-10 and 11-50
These filters produce a massive list of 230K+ results - so you want to bring this down to a more focused group.
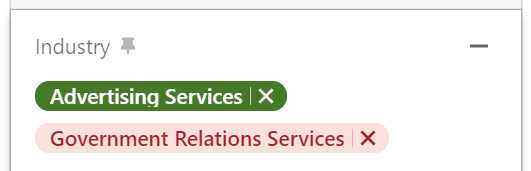
As you go through the list, you might find that there are industries included here that shouldn't be included. Go back to your filters and in the Industry search, exclude these industries.
There are other filters you can use to further reduce this list, such as:
- Company Headcount Growth
- Department Headcount Growth
- Job Opportunities
- Recent Activities
Once you have narrowed down your list based on your preferences, select them and create a list:

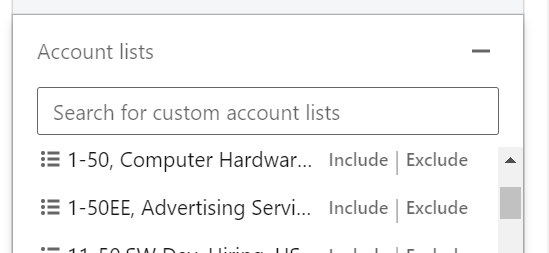
Click ‘Save to List’ and name your list. I’ve named my list as ‘1-50EE, Advertising Services, USA. I keep adding more companies to my list as I progress.
Once you have reached the maximum amount allowed in a list, go to Lead Filters on the Top Left. Go to ‘Account List’ and you will find the Account List you just created:
Now find the leads you want to prospect on.
I earlier mentioned that this example is focused on selling to the Business Owner which in this case could be ‘Founder’, ‘CoFounder’, and ‘CEO’. Select them in the Role filter, under ‘Current job title’
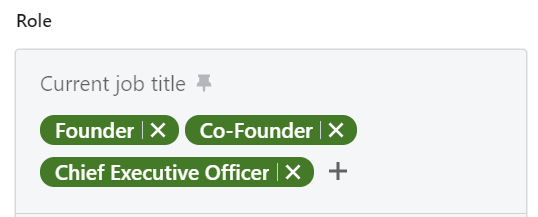
This way you can be very specific to only find leads at the companies that fit your ideal customer profile.
In Lead Filters you will find a lot of other filters that you can use to further narrow your list, such as:
- Company Type
- Years in current company
- Activities and Shared Experiences
Other Sales Navigator List Tips:
Here are some triggers you can use to filter down your leads. Sticking to the same example of selling to business owners of small businesses in the advertising services, here are some relevant filters you can apply:
- Department Headcount Growth - Let’s say you are selling services for staffing, this could be a good way to see which companies are growing their headcount. As a staffing company, a prospect that is actively growing its headcount could signal that they are in the market to hire more talent. This further narrows down your list.

2. Connections of - This is a great way to find connections of specific people you are connected to so that you can request a referral. Add the name of the person you would like to find connections of in the lead list.
There are numerous other filters that can be added to reduce the prospect list, such as ’Previously worked at’, ‘Recent Job Changes’ etc.
Next steps:
Once you have your target list ready, you can now include them in your outreach methods through email, LinkedIn automation, Cold calling etc.
The Ultimate Guide to Hiring a Salesperson!
Get the step-by-step guide to hiring, onboarding, and ensuring success!